Loading terrain data operation instruction
Overview
SuperMap supports generating a 3D terrain cache for raster datasets, that is, processing terrain data into tile files to optimize the publishing of terrain data on the server side and the browsing performance on the client side, so SuperMap iClient3D for WebGL (hereinafter referred to as : WebGL client) can access the 3D service published by SuperMap iServer to load terrain data.
This document mainly explains the detailed operation process of WebGL client to load and browse terrain data. The main operation process is as follows:
Operation flow
The following will take the example number "Mount Everest" for detailed operation demonstration.
1. Generate cache data
Instructions for use
In this operation step, use the SuperMap iDesktop desktop product to generate the terrain data into a Tin type 3D terrain cache (*.sct).
Steps
(1). Open the SuperMap iDesktop desktop product, and right-click "Data Source" in "Workspace Manager" to "Open File Data Source" ".

Figure 1: Open the data source
(2). Select the raster dataset you want to generate a terrain cache, and right-click the "Generate Scene Cache" option.
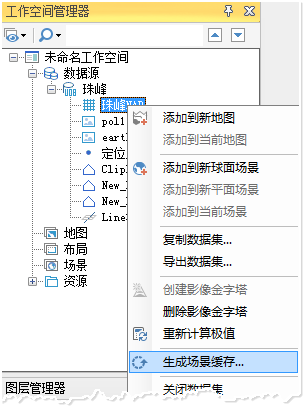
Figure 2: Select "Generate Scene Cache"
(3). The "Generate Scene Cache" dialog box pops up, as shown in the figure below.

Figure 3: "Generate Scene Cache" dialog box
(4). The data set in the data list is the data set that will be cached. You can click "Add Data Set" or delete the icon to manage the data set that will be cached. Set the following:
- Cache type: select "Tin";
- Division method: Select "Spherical surface".
(5). In the dialog box "Parameter Settings", set the following:
- Cache name: Enter the cache name, the default is "data set name@data source name";
- Cache path: Set the output path of the cache;
- Starting layer: Set the number of layers to start generating cache;
- End Layer: Set the number of layers that will end generating the cache;
(6). The information related to "Cache Range" and "Scale" can be left unchanged. Click the "Generate" button and wait for the generation to complete.
Result of the operation
After the cache generation is completed, open the target path "Terrain" folder, and store a "info.sct" file, which is the cache configuration file of terrain data, and the digitally named folder is stored The terrain data of different levels are shown in the figure below.
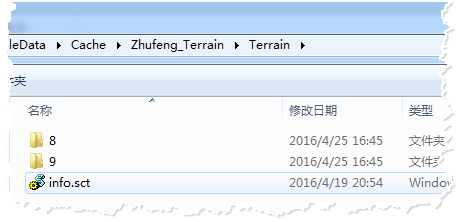
Figure 4: Generate scene cache result
2. Publish 3D service
Instructions for use
In the previous step, the terrain cache data was generated, and then the terrain cache was published as a three-dimensional service to a local or remote server, so that the WebGL client could load the terrain service.
Steps
(1) In the "Workspace Manager" of the SuperMap iDesktop desktop product, right-click "New Spherical Scene" under "Scene" strong>".
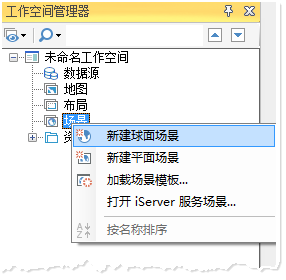
Figure 5: Create a new spherical scene
(2) Select "Terrain Layer" under "Layer Manager", right-click "Add Terrain Cache", select The *.sct file generated in the previous step.
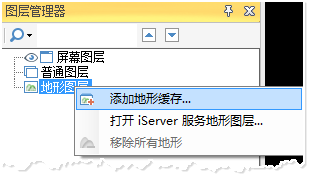
Figure 6: Adding a terrain cache to the scene
(3) After adding the terrain cache, save the scene and workspace. The workspace file will be used to publish the 3D service of the workspace type.
(4) After saving the workspace, in the %SuperMap iServer_HOME%/bin directory, click the "startup.bat" batch file to start the SuperMap iServer service.
(5) Open the browser and enter http://localhost:8090/iserver/manager in the address bar Enter the "Service Management" page, and click "Quickly publish a service or a group of services" under "Home" Button.
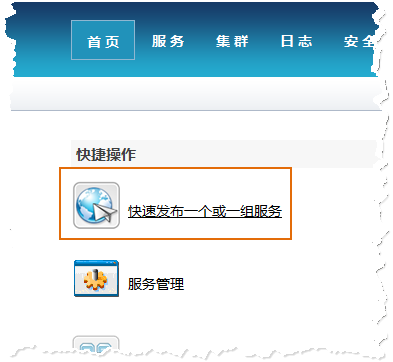
Figure 7: Quickly publish a service or a group of services
(6) The "Quick Publish Service-Select Data Source to Publish" dialog box pops up, select "Workspace" at "Data Source" strong>", click "Next".
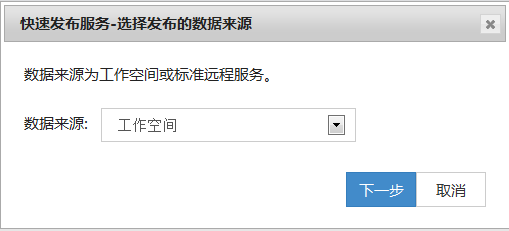
Figure 8: Data source selection workspace
(7) The "Quick Publish Service-Configuration Data" dialog box pops up, click the "Remote Browsing" button to select the previously saved workspace, and click"Next".
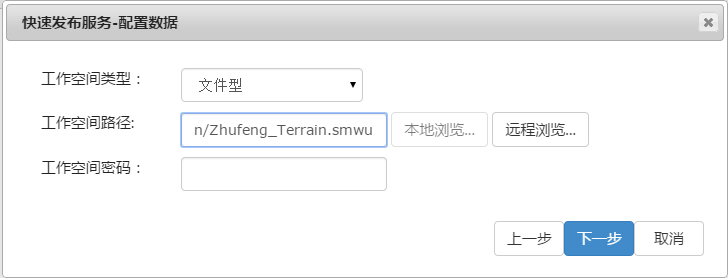
Figure 9: Select workspace configuration data
(8) The "Quick Publish Service-Select Service Type to Publish" dialog box pops up, check "REST-3D Service", click "Next One step".
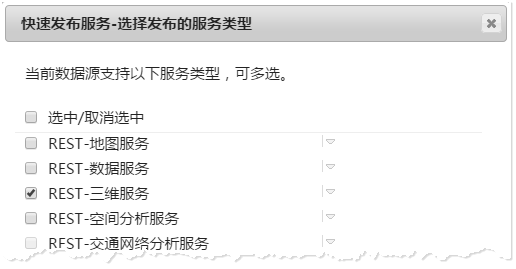
Figure 10: Check the 3D service
At this point, the service publishing has been configured. Follow the prompts to click the "Finish" and "Close" buttons.
Result of the operation
After the service is published, it will be listed in the service list (http://localhost:8090/iserver/services) displays the 3D service, as shown in the figure below.
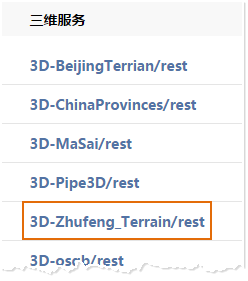
Figure 11: The newly released service is displayed under the 3D service
3. Client loads terrain data
Instructions for use
After publishing the 3D service, you can browse the terrain data through the WebGL client in this step.
Reminder: Please store the WebGL product package in the %SuperMap iServer_HOME%/webapps directory before operation.
Steps
(1) Obtain the 3D data url address, click to obtain in the following order:
- Enter the service list page (http://localhost:8090/iserver/services), find and click the 3D service published in the previous step;
- Go to the "Root Directory" page and click "realspace";
- Go to the "3D service root node(3D)" page, click "datas";
- Go to the "3D Data List (datas)" page and click the link under "3D Data Set List";
- Go to the "3D Data Resources(data)" page and copy the urladdress in the address bar of the browser at this time strong>.

Figure 12: Copy URL address
(2) Enter the storage path of the WebGL product package (%SuperMap iServer_HOME%/webapps), under the "examples" folder, open "terrainAndImagery.html "For example, modify the content as shown in the figure below.
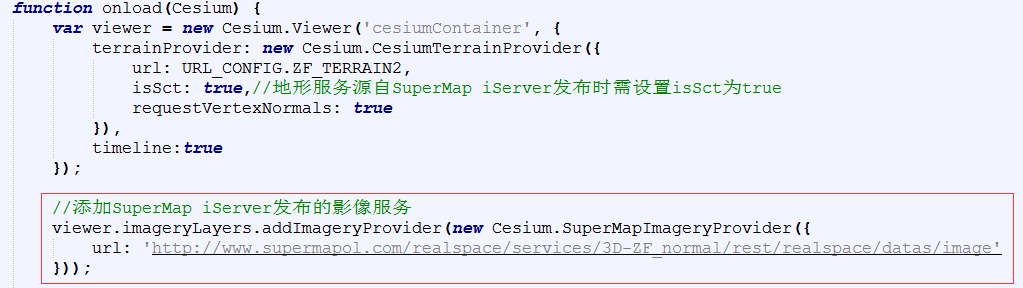
Figure 13: Modify some parameters of the example
(3) Open the "terrainAndImagery.html" webpage in localhost, and the browser input address is: http://localhost:8090/%WebGL product package%/examples/ terrainAndImagery.html
Result of the operation
After opening the webpage, the camera flies to the location of the terrain data, the display effect is as follows:
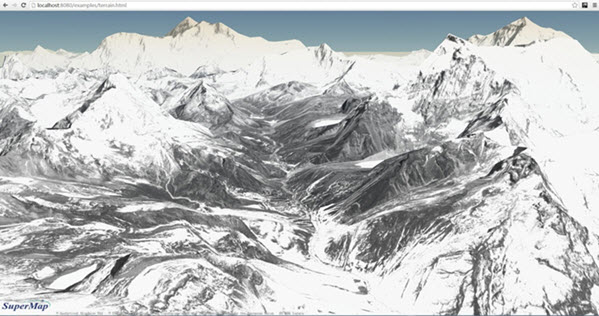
Figure 14: WebGL browsing terrain data effect
Note: The effect of the above picture is the effect of loading image data and terrain data. For operations related to loading image data, please refer to Loading image data Manipulate documents.