This article introduces how to perform the data registration in with the demonstration of vector data on Beijing. There are two datasets (subwaylnwgs84 and RoadCentlnwgs84), and some offset happened leads to the truth position can not be expressed. You can correct data as following steps:
 Basic steps
- Click “Start” tab > “Data Processing” group > “Registration” drop-down button then select “New Registration” to open the guide dialog box.
- Step 1: select registration data : Click the “Add” icon, and then in the pop-up “Select” dialog box select datasets to be registered.
- Multiple datasets can be registered at the same time.
- Your map also can be selected as the registration data. If you select a map, all layers in the map will be selected as the registration data.
Here, add the two datasets (subwaylnwgs84, RoadCentlnwgs84).
- Step 2: select reference data : You can select any dataset, or a configured map as reference data. Here, we select the high-definition image layer.
- Click “Finish” to finalize the preparation of registration data, and then begin to register data.
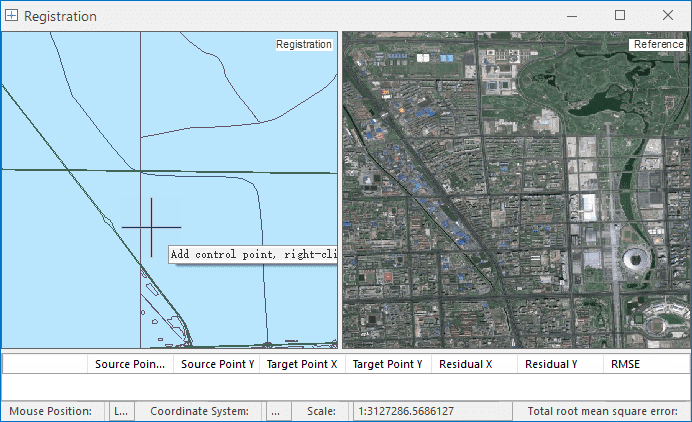
Figure: The Registration window
Note : When you want to do the addition, deletion or sorting of existed registration layers or reference layers, you can perform the related operation in the corresponding registration window. Or, you can drag your dataset or map directly to the registration widow to open data.
- Image Stretch : In the “Registration” tab and the “Image Stretch” group, you can set the stretching mode for your image data involved in the registration to get more display efficiency during the operation.
The provided stretch modes include: None, Maximum Minimum, Standard Deviation, Gaussian. For detail usages, please refer to Image stretch.
 Related topics
- In the registration window, select the control point.
- If you have the configuration file of control points (*.drfu), you can import it directly. About the detail operation, please refer to Importing/exporting the Registration Information File.