上传数据 |
本范例程序是基于 jQuery 插件 AjaxFileUpload 来实现 ajax 文件上传的。
在 iPortal 中,系统管理员和拥有 DATA_CENTER 角色的用户可以上传数据并将其发布为服务。上传数据时,您需要完成如下三个步骤。
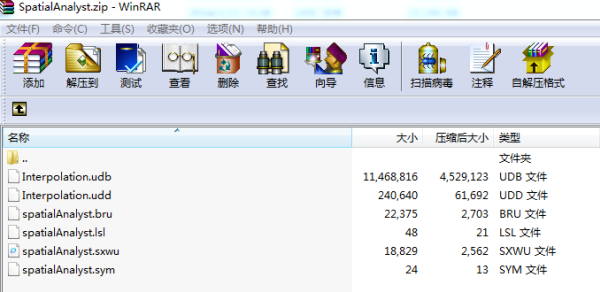
1. 将工作空间和数据源打包为*.zip 格式,打包页面截图如下:

2.iPortal 中的 myDatas 资源是当前用户上传的所有数据信息的集合。而上传文件,首先要新建资源,即对 http://localhost:8190/iportal/web/mycontent/datas.rjson 执行 POST 请求,请求体包含需要上传的文件名称,其代码如下:
var uploadTaskURL="";
var entry = {};
//上传数据名称
entry.fileName = fileName;
//上传类型
entry.type = "WORKSPACE";
$.ajax({
url: rootUrl+'web/mycontent/datas.rjson?token='+ token,
method: "POST",
data: JSON.stringify(entry),
dataType : "json",
success: function(data){
alert("新建资源 ID:" + data.childID);
submitFromDemo(data.childID,fileName);
$('#infoMassage').show();
},
error: function(data) {
$("#openDateButton").removeAttr("disabled");
alert("新建资源失败");
}
});
3.新建资源成功后会返回一个数据项 id,该 id 用于数据文件的上传。对 fieUpload 资源执行 POST 请求,其 url 为:
http://localhost:8190/iportal/web/mycontent/datas/id/upload.rjson
代码如下:
var urlLoad = rootUrl + "web/mycontent/datas/"+id+"/upload.rjson?token=" + token;
$.ajaxFileUpload({
url:urlLoad,
dataType : "json",
method: "POST",
secureuri:false,
fileElementId:'fileSelect', // 指代文件输入框 id
success: function(data){
$("#infoMassage").show();
$("#infoMassage").append("<p><strong style='color:red'>" + fileName + " 数据上传成功</strong></p>");
$("#infoMassage").append("<p>资源结果:<a href='http://localhost:8190/iportal/web/mycontent/datas/"+id+".rjson?token="+ token +"' target='_blank'>http://localhost:8190/iportal/web/mycontent/datas/"+id+".rjson</a></p>");
$("#infoMassage").append("<p><input id='openDateButton' type='button' value='是否公开数据' onclick='openDate("+ id +")'/><label id='openDateTxt'></label></p>");
},
error: function(data) {
}
});